US Stamps
How to make an album page using Microsoft Word
By William F. Sharpe
Word, the word-processing component of Microsoft Office, allows easy creation of album pages.
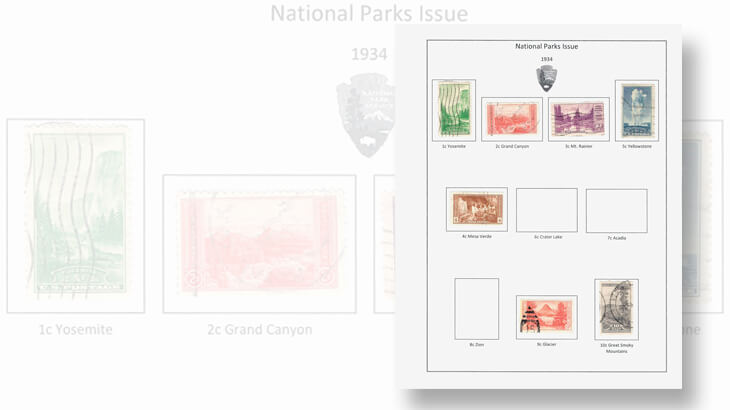
I used Word 2016 to create an album page for the United States 1934 Natural Parks stamps (Scott 740-749) in less than 30 minutes.
The 10 stamps were issued in honor of National Parks Year. The stamps promoted America’s scenic beauty and resources to a country in the depths of the Great Depression.
Connect with Linn’s Stamp News:
Sign up for our newsletter
Like us on Facebook
Follow us on Twitter
More recently, the United States Postal Service issued a 16-stamp National Parks Centennial pane June 2 at World Stamp Show-NY 2016. These stamps depict photographs and artwork representing 16 parks selected from the more than 400 existing parks.
To start making a stamp album page in Word, open the program and create a new document. Using the margins drop-down list on the layout tab, set the page margins in inches to 1.25 left, 0.50 right and 0.75 top and bottom. This will allow extra space on the left for inserting the page in a loose-leaf binder.
If you make a mistake when working on your page, Word 2016 includes an undo button at the top left of its window so that you can undo it. You also can use Ctrl-Z as a keyboard shortcut for the undo choice. In addition, there is a “tell me what you want to do” option on the top menu that lets you type in your question or topic of interest.
Following are the steps I used in making the National Parks stamps album page. A similar process can be used for creating pages for other stamps.
For the heading on the page, type “National Parks Issue” on the first line. Hit the enter key and type “1934” on the second line.
Select the first line of text and on the home tab change the font size to 14 points and center the text.
Select the second line, change the size to 12 points and center that text.
I inserted the National Park Service logo from the insert tab, online pictures choice.
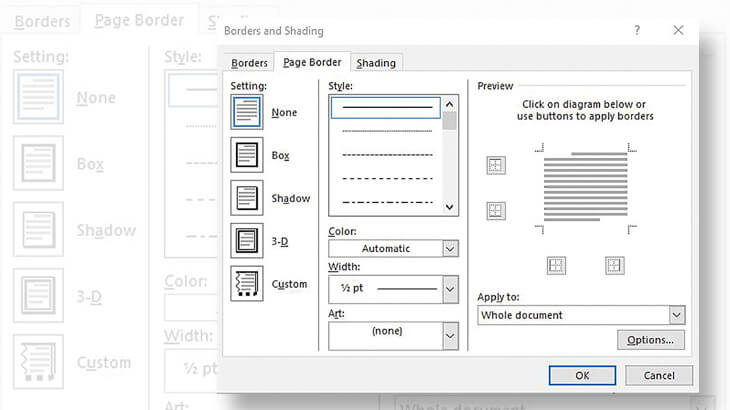
If desired, you can add a page border from the design tab. For a border like the one on the National Parks stamp page, select a box border, double-line style, and also select “measure from text” from the options button on this window.
Next, place the stamp frames on the page and arrange them.
To do this, use the insert tab, select shapes and choose rectangle. Click a spot near the left side below the text. Hold the mouse key down and draw a rectangle about the size of a vertical commemorative stamp. You’ll size it exactly later.
You will create a blank rectangle with a color fill. Be sure the rectangle is selected, i.e. it will have sizing handles around it. Double-click on the rectangle to display the format tab in the ribbon. In the style shapes group, click on the first design, “black dark 1.”
You may have to use the scroll bars in the style shapes window to scroll up to that first choice.
You should see the fill color disappear from the rectangle. Specify the height as 1.75 inches and the width as 1.25 inches in the size group at the right of the ribbon.
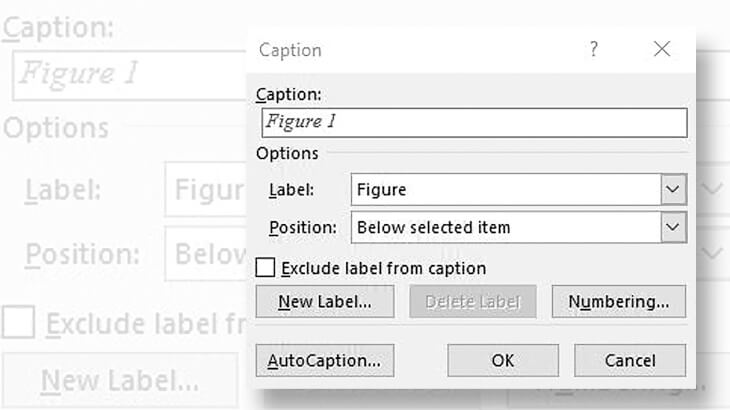
The captions below the stamp frames are created next. Go to the references tab and click insert caption. Click new label in the caption dialog box that appears. Type “1c Yosemite.”
You should see a label below the rectangle. Click on the box under the stamp. Select the entire text. Remove any special font attributes and center the text in the box using the commands in the font and paragraph setting of the home tab. Then delete any extraneous characters in the caption.
Click on the layout tab. Next click on the rectangle, then shift-click on the text below it. Both blocks will be selected. Click on group in the “arrange group” to group the two selections as one.
Create a second rectangle to the right of the first stamp. Specify the height and width of this block as 1.25 inches and 1.75 inches, respectively. Insert a new label as before and label it “2c Grand Canyon.” Group the two selections as before as well.
With the first grouped item selected, type Ctrl-C to copy it, then Ctrl-V to paste another copy. Drag the second copy to the right side of your page. Make two more copies and paste them at the right and left side near the bottom of the page.
Create another rectangle next to the 1c Yosemite rectangle but make the dimensions 1.25 by 1.75 to get the horizontal commemorative stamp size. Label this rectangle “2c Grand Canyon.”
Group the rectangle and caption again and make five copies. Place one copy next to the Grand Canyon stamp, three below these stamps, and one between the stamps near the bottom. You should now have 10 stamp boxes on the page.
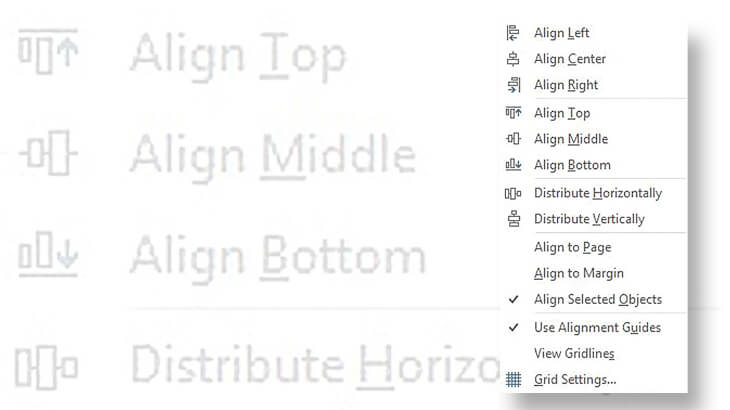
Click on the left stamp box in the first row. Shift-click on each of the other stamp boxes in the row. Click on the align arrow in the arrange group of the layout tab and select align bottom.
With all the stamp boxes still selected, click on align again and select “distribute horizontally.” Repeat this procedure for the second and third row of stamps.
The next step is to correct the captions. The first two stamp boxes should be labeled correctly. For subsequent stamp boxes, click the label box under each stamp and enter the following words for the caption: 3c Mt. Rainier, 5c Yellowstone, 4c Mesa Verde, 6c Crater Lake, 7c Acadia, 8c Zion, 9c Glacier, 10c Great Smoky Mountains.
In order to distribute the stamps equally on the page vertically, group all the selections in each row separately, then select all three groups, click align on the layout menu and select “distribute vertically.”
You can save this file as a Word document or export it as a PDF (Portable Document Format) file. Others can then view the album page without needing the Word program.
There are many ways to purchase Word 2016 if it’s not already installed on your computer. Find details online. Office 365 includes Word 2016 along with other Office applications.
If you like your album pages already made, you can download a set of album pages covering national parks with extensive descriptive material from the American Philatelic Society.
Read previous Computers and Stamps columns:
Websites of Stamporama and ATA have won several APS awards
Graphics Philately Association’s website includes articles, stamp gallery
MORE RELATED ARTICLES
Headlines
-
US Stamps
Oct 7, 2024, 3 PMMcMurtrie dismissed as APS education director following Sept. 21 arrest
-
US Stamps
Oct 7, 2024, 12 PMVasiliauskas named president of Mystic Stamp Co.
-
US Stamps
Oct 6, 2024, 5 PMApgar souvenir card available
-
US Stamps
Oct 6, 2024, 4 PMFirst Continental Congress and U.N. stamps receive Scott catalog numbers


